Discovery Guide: Learning to use Cold-Bend™ Hardwood
Richard Maxwell
Understanding Cold-Bend™ Technology
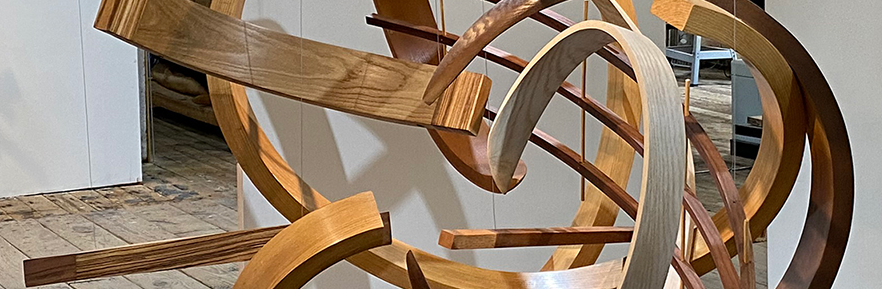
Cold-Bend™ hardwood represents a revolutionary advancement in woodworking materials. This superwood achieves its remarkable flexibility by stretching as it bends, allowing it to curve in any direction and even twist into complex shapes. Unlike traditional steam-bent wood, Cold-Bend™ hardwood accomplishes these dramatic curves at room temperature without any heat or steam treatment.
Learning the Craft
Before attempting any paid customer projects with Cold-Bend™ hardwood, invest time in understanding its unique characteristics. There is definitely a learning curve involved in mastering this material. You'll need to discover which tools work best for your applications, how to apply leverage effectively to accomplish bends, and what the wood will look like after bending and drying. Additionally, you'll learn proper surfacing techniques to fit bent components with other parts, methods to control shrinkage and cupping, which tools might leave unwanted marks, and the best ways to support the wood during both bending and drying processes.
First Experiments
An excellent introduction to Cold-Bend™ hardwood involves resawing a piece to approximately 3/8 to 1/2 inch square and bending it into a ring. Start by tying the strip in a knot, then progressively reduce the radius to test the material's limits. The general guideline suggests a 1:5 thickness-to-radius ratio, meaning a 1-inch thick board can bend to a 5-inch radius, while a 1/2-inch thick board can achieve a 2.5-inch radius.
Coarse-grained hardwoods such as ash and oak frequently exceed this recommended ratio and can be bent to even tighter curves. Don't hesitate to push beyond the 1:5 guideline, as any failure from over-bending will manifest during the initial bending process, not later during drying. Most woodworkers tend to be conservative when testing bend radius limits. If a thick piece seems to resist bending as far as expected, and it hasn't broken, you likely need more leverage rather than having reached the material's limit.
Once you've created a tight knot, weave or wrap the remaining strip around the ring like creating a wreath. It's valuable to intentionally break a small test piece to understand the absolute limits of the material. If you haven't broken a test strip, you haven't yet discovered how far the wood can actually bend.
Preparation and Surface Treatment
Optimal results come from surfacing or sanding the compressed wood before bending, since working on flat, unbent surfaces is considerably easier than trying to sand complex curves afterward. Unlike traditional bent wood, Cold-Bend™ hardwood requires no compensation for spring-back, as it maintains its shape on the form once properly dried in position.
Bending Techniques
Cold-Bend™ hardwood accommodates both hand bending for thinner dimensions and mechanical leverage for thicker pieces. For precise shapes, bend the wood on a form that provides complete support along the inside of the curve. The material readily accepts multiple complex curves and twists within a single piece, though proper fixturing becomes important for such applications. Sculptural work requiring less precision can utilize relatively simple fixtures.
The wood develops a "set" or "memory" of its new shape within minutes, but longer setting times improve this memory retention. Allow approximately 30 minutes for optimal results, though you can over-bend pieces and use shorter hold times when necessary.
Drying Considerations
Compressed wood isn't ideal for very gentle bends unless you provide full support during drying. The material's natural tendency to bend can cause movement during the drying process if gentle curves aren't properly supported. While supporting the outside curve isn't typically necessary, projects requiring absolute precision with minimal post-drying surfacing should secure outside curves as well. Use clamping cauls to distribute pressure evenly, ensuring the wood receives full and uniform support.
Tools and Equipment
For challenging curves or small radius bends, pneumatic and hydraulic presses offer excellent control, though hand clamps work effectively for nearly any conceivable bend. The Irwin XP500 clamp (identifiable by its blue and silver coloring, not the less expensive yellow and blue version) proves particularly valuable for bending applications. This clamp grips odd angles better than most alternatives and provides substantial strength. Ratchet straps also serve as useful tools in the bending process.
Bend Radius Guidelines
Target a minimum radius of five times the board thickness for extreme bends in most coarse-grained species, while fine-grained woods typically require a 1:6 ratio. Various techniques can help exceed these guidelines when necessary. A 1/2-inch board usually bends to a 2.5-inch radius, while a 1-inch thick piece can potentially achieve a 5-inch radius.
Hand Bending Techniques
Hand bending represents an excellent approach for working with compressed wood. The middle sections of long strips bend more easily than the ends, primarily due to better leverage rather than material differences. Achieving good leverage at the ends requires more effort, but the ends can be bent effectively with proper technique. This consideration applies more significantly to pieces 1 inch thick and above. For pieces under 1/2 inch thickness, bending nearly to the very ends becomes quite manageable.
Plan for several inches of waste at each end to allow for later trimming, and account for approximately 0.5% shrinkage during the drying process.
Temperature and Moisture Requirements
Cold-Bend™ hardwood should never be heated or steamed prior to bending. Steam treatment actually removes the compression from the wood, eliminating its remarkable bending properties. The material achieves extreme radii at room temperature as long as it retains its moisture content. As the wood ages and dries, flexibility decreases correspondingly.
Maintaining Flexibility
After resawing, immediately rewrap unused compressed wood in kitchen stretch wrap to preserve moisture and flexibility. Wood that has dried on your workbench or shop floor can regain some flexibility through soaking in warm water, provided it hasn't been kiln dried. Small pieces can be warmed briefly in a microwave, but exercise extreme caution with this method.
When microwaving wood, use only enough time to warm the material without drying it. The microwave dries the interior first, where damage isn't immediately visible. Continued microwave exposure can turn the wood's interior to charcoal, creating smoke and potentially leading to fire hazards. Always err on the side of caution with microwave warming techniques.

Cherner Chairs